
A New Dental Office Is Coming to Rehoboth BeachAnticipated Opening Late November or Early December 2026

Join the Opening List
Building your practice

Watch Your Dental Office Being Built

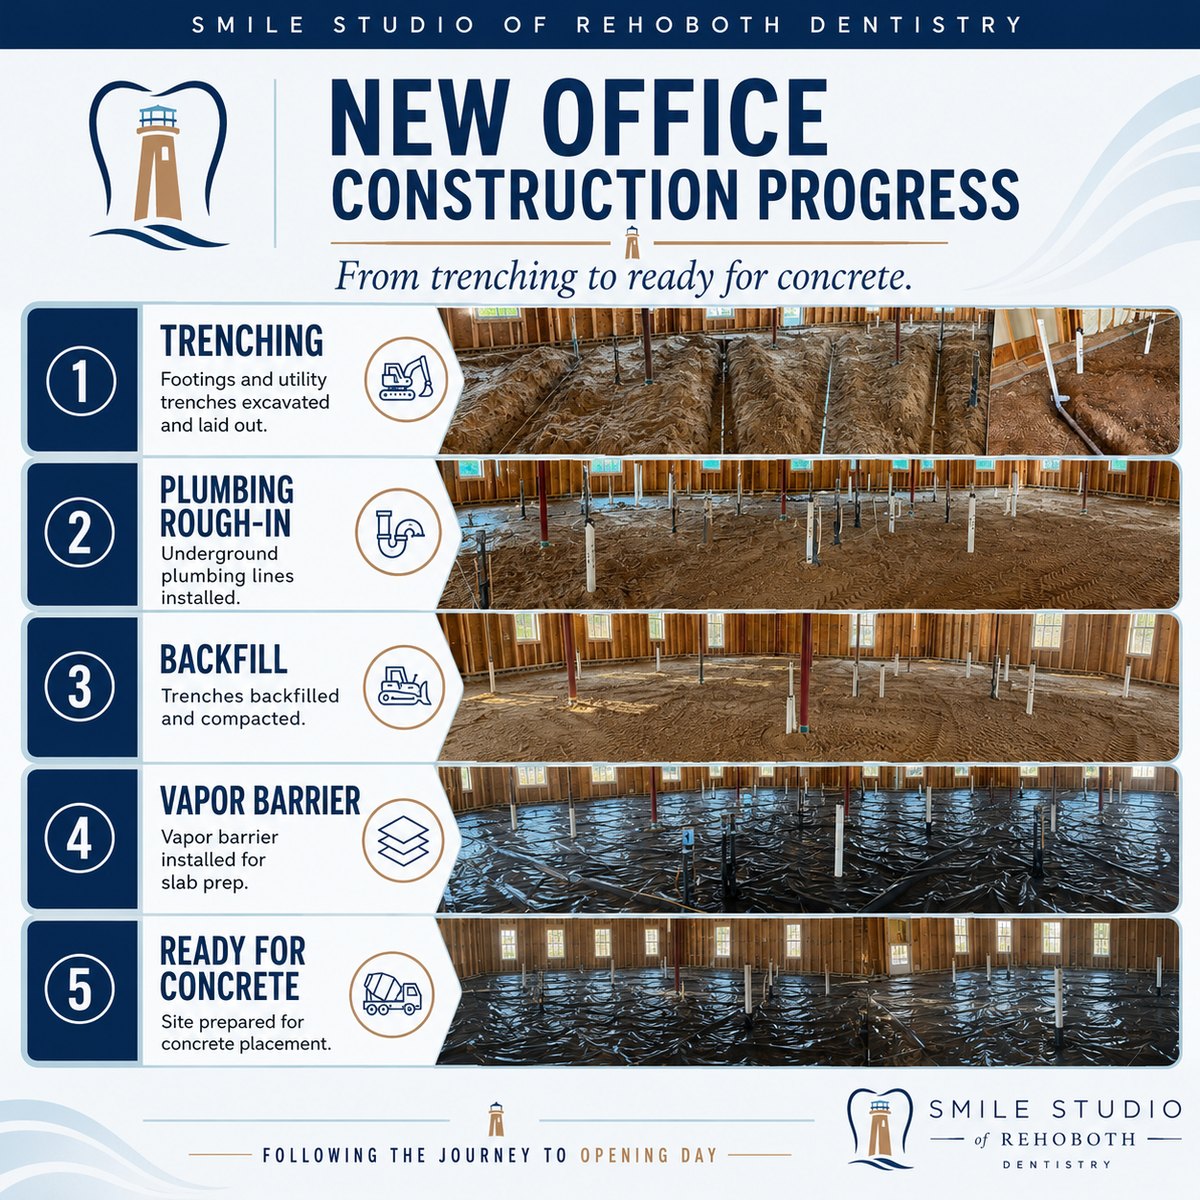
Most people meet a dental practice on the day it opens. You get to see it from the dirt up. This is the real build at 19411 Plantations Road, photographed on site.

Smile Studio of Rehoboth new office construction progress graphic, showing five stages with site photographs: trenching, plumbing rough-in, backfill, vapor barrier, and ready for concrete.
Progress at a glance

Five Stages, One Floor

Everything below the concrete happens in a fixed order, and each stage has to pass before the next can start. Here is where the build stands today.

  1. Trenching. Footings and utility trenches excavated and laid out.
  2. Plumbing rough-in. Underground plumbing lines installed.
  3. Backfill. Trenches backfilled and compacted.
  4. Vapor barrier. Vapor barrier installed for slab prep.
  5. Ready for concrete. Site prepared for concrete placement.

All five are complete. The concrete pour is next.

15 photographs from site

From String Lines to a Floor Ready for Concrete

Underground plumbing is the stage of a dental build with the least room for error, because all of it disappears under the slab. Here is how it went in.

  1. Before Stage 1 · Setting out

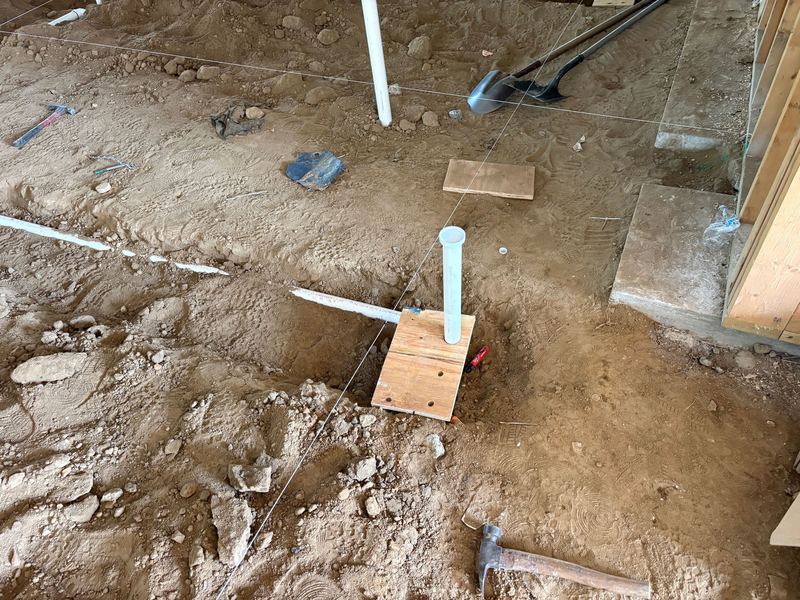
    It Starts With String and a Tape Measure

    Before anything is dug, the whole practice gets drawn on the ground. Those string lines are the floor plan at full size.

    Every white pipe you can see marks a fixture that will exist in the finished office. A sink in a treatment room. A floor drain. The plumbing for a sterilisation area. Each one has to be within an inch or two of where the cabinetry will eventually sit, because once the concrete goes down, moving it means cutting the floor open.

    This is the least photogenic day of the entire build, and it is the one that decides whether everything downstream lines up.

    Dirt floor marked with taut string lines, a capped white PVC stub-up braced upright on a plywood scrap, with a hammer and shovel resting nearby.
    String lines and a braced stub-up holding one fixture location.

    The room you will sit in one day was measured out, in dirt, before a single pipe went in the ground.

  2. Stage 1 of 5 · Trenching

    Cutting the Trenches

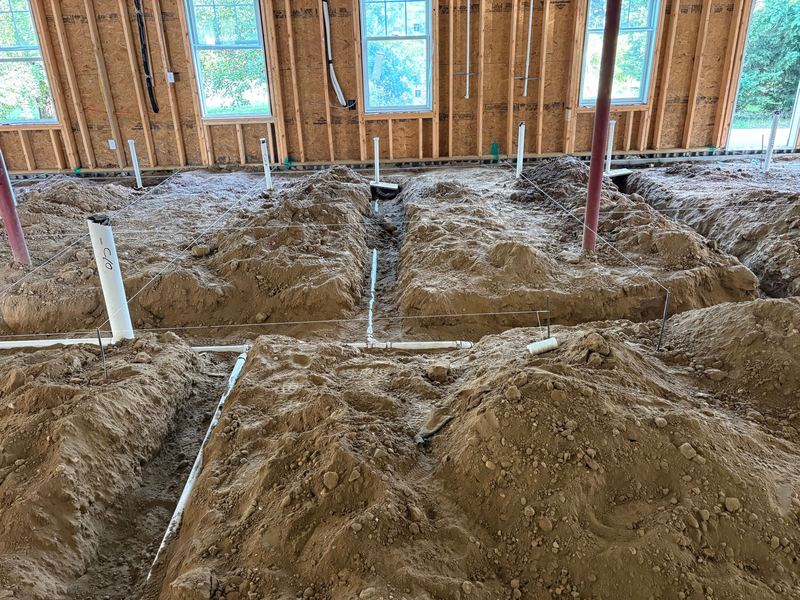
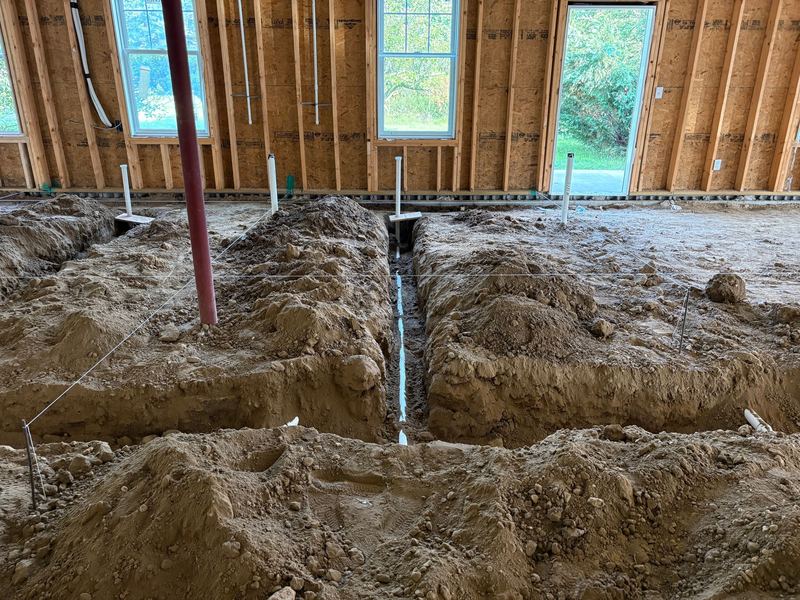
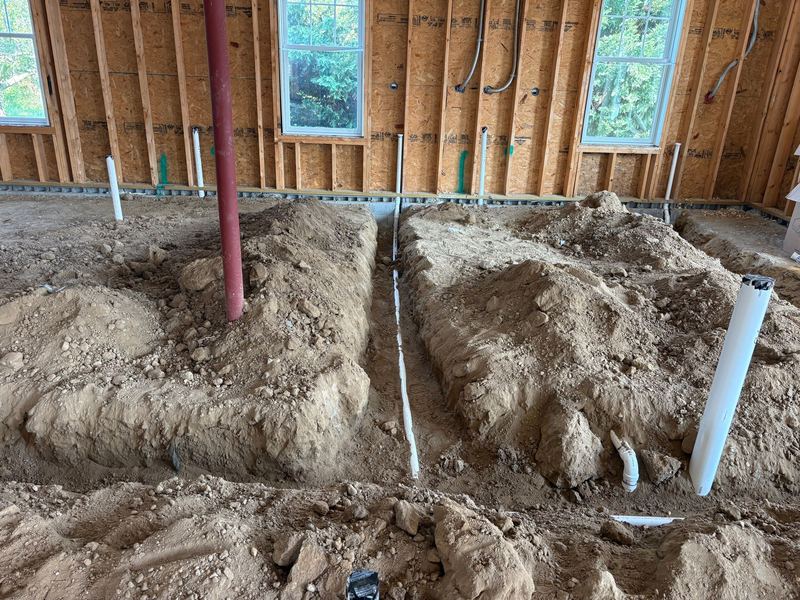
    Then the floor gets opened up. Every trench carries a drain line, and every drain line has to fall at a steady, deliberate slope so that gravity does the work for the next several decades.

    Underground plumbing is one of the few parts of a building you genuinely only get one shot at. It goes in before the slab, it is buried under reinforced concrete, and it is expected to run without attention for the life of the practice.

    So it is set slowly, checked against the string lines, and checked again. The trenches look chaotic in a photograph. On the ground they are laid out to within a fraction of an inch.

    Wide view of open trenches cut across a dirt floor with white PVC drain lines laid in them, string lines stretched overhead, and framed exterior walls with windows behind.
    The trench layout, with string lines still stretched over the top.
    A deep trench running toward the camera with a white PVC drain line at the bottom, red steel support column to the left, and a framed wall with windows and an exterior door behind.
    Depth matters. The fall on these lines is set by hand and checked.
    Trench running parallel to a framed exterior wall with a white PVC drain line in the base, capped stub-ups standing along the wall, and flexible electrical conduit above.
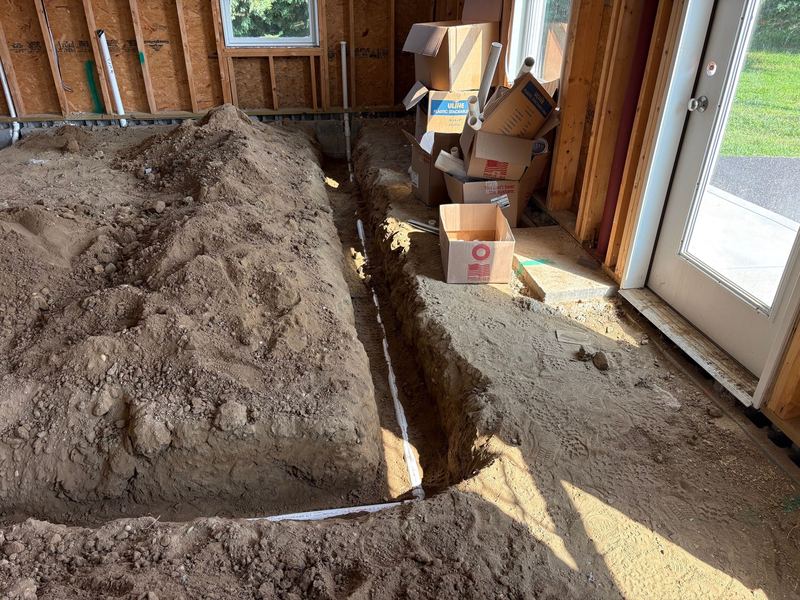
    A long trench with a drain line running toward a glass exterior door, with cartons of pipe fittings stacked in the corner and daylight coming through the doorway.
    Boxes of fittings staged where the line exits the building.

    Nobody will ever see this work again. It is the part of the office that has to be right precisely because it will be invisible.

  3. Stage 2 of 5 · Plumbing rough-in

    Every Pipe Has a Name

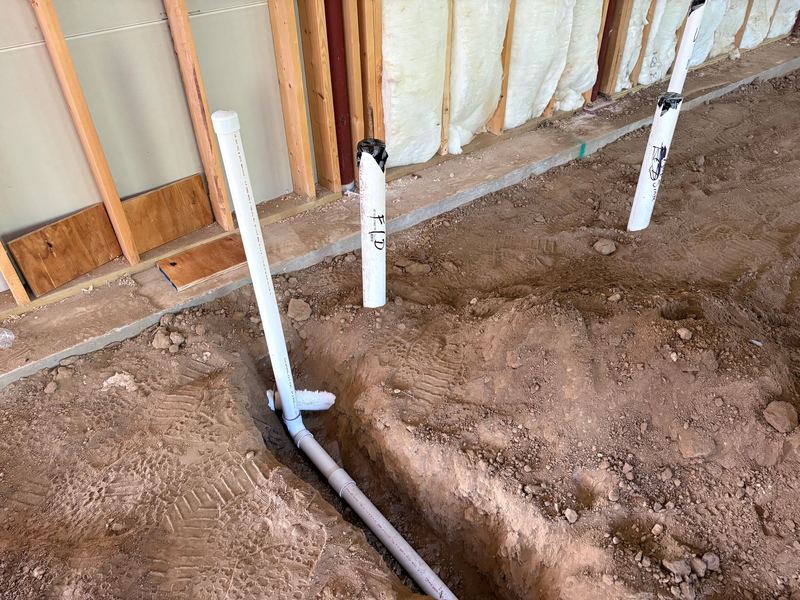
    Look closely at the stub-ups and they are all written on. FD is a floor drain. SINK is a sink. C/O is a cleanout. W/C is a water closet.

    This is how a building keeps track of itself. Months from now, when the concrete is down and the walls are up, somebody will need to know exactly which pipe is which without excavating to find out.

    It is also, in a small way, the first time the finished practice becomes legible. You can stand on the dirt, read the labels, and see where the treatment rooms are going to be.

    Close-up of three capped PVC stub-ups rising from a dirt floor, hand-labelled in marker, next to a trench with a drain line and a wall filled with spray foam insulation.
    Hand-labelled stub-ups: floor drain, sink, and cleanout.
  4. Stage 3 of 5 · Backfill

    Buried, Compacted, and Graded

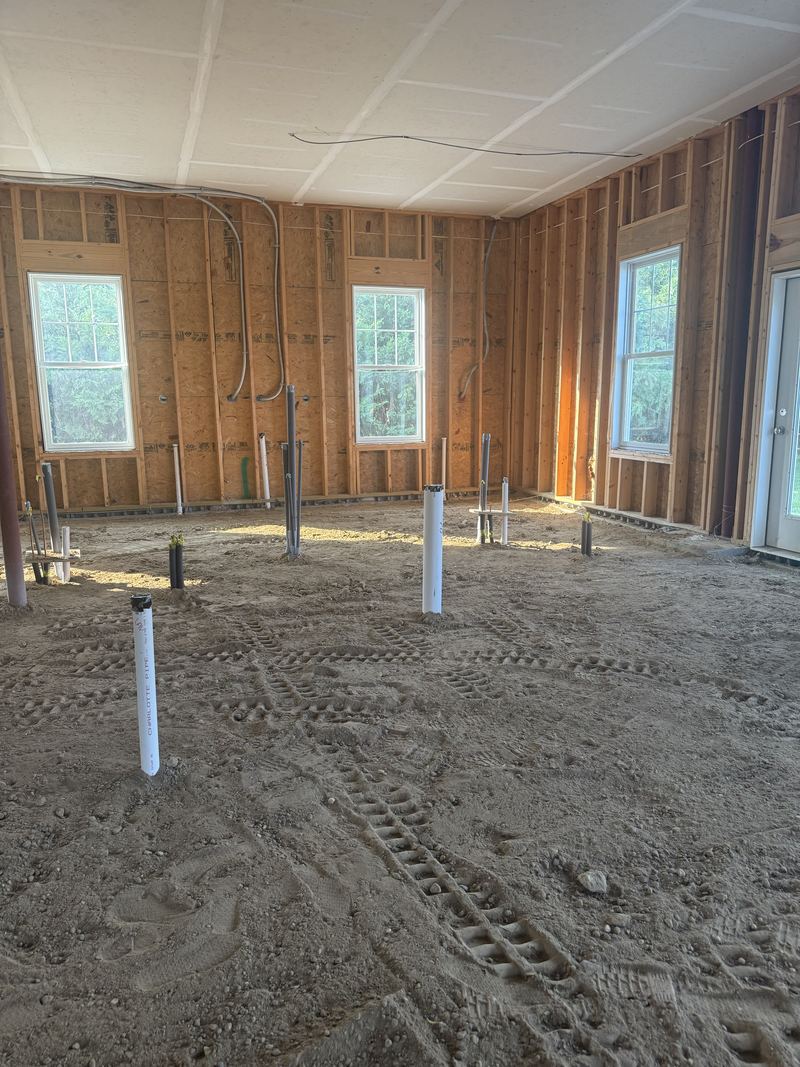
    Once the underground plumbing passes inspection, the trenches are filled back in and the whole floor is compacted and brought to a level grade.

    The tracked patterns in the dirt are from the compactor. Loose fill under a concrete slab is how you get a floor that cracks and settles, so the ground gets worked until it stops moving.

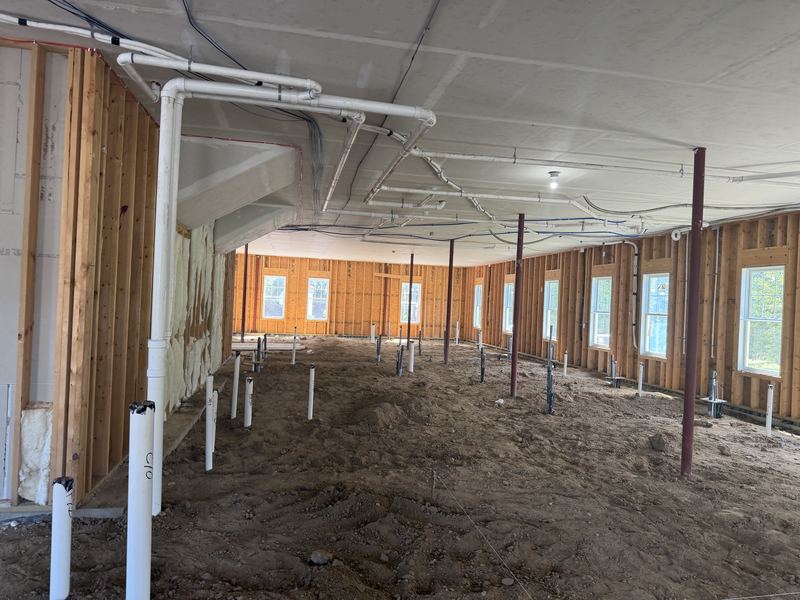
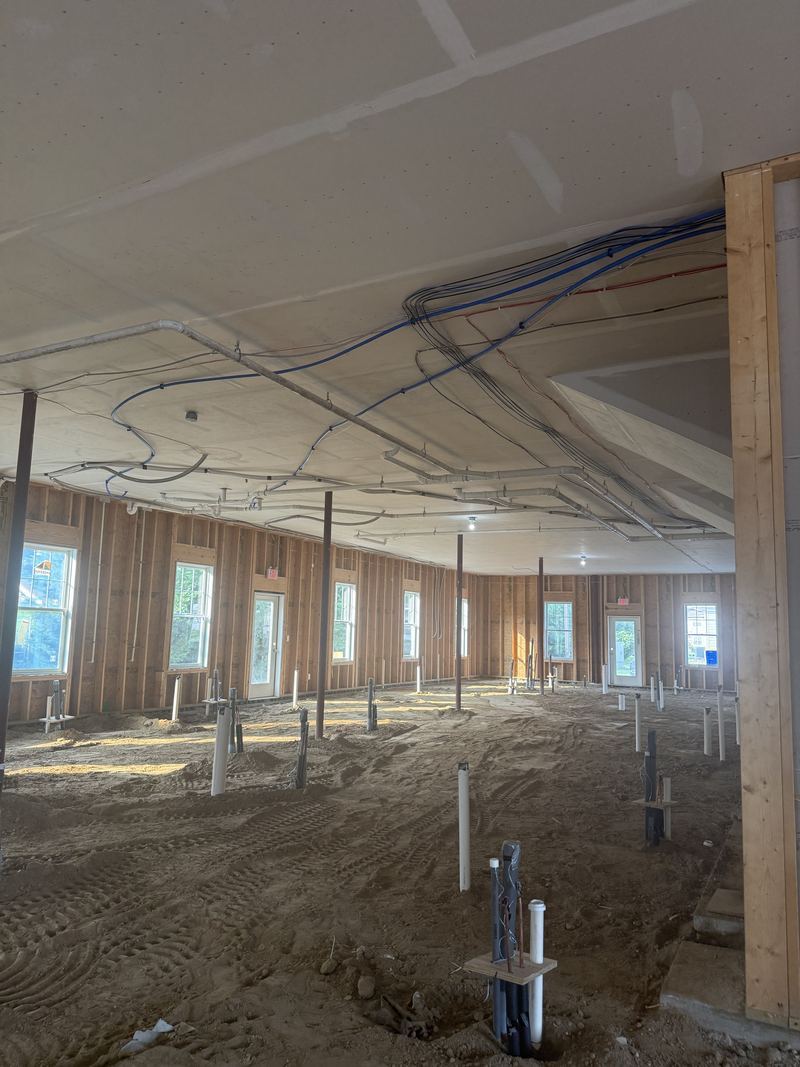
    Overhead, a second layer of the building is already in place: waste lines, water lines, and the electrical rough-in running above what will become the ceiling.

    Long interior view over a backfilled dirt floor dotted with capped stub-ups, with white PVC waste lines and blue water lines running along the ceiling and red steel columns down the middle.
    Underground work buried, overhead rough-in already running.
    Interior with a graded dirt floor and dozens of plumbing stub-ups, looking up at a ceiling carrying white PVC pipe, blue water lines, and bundled electrical cable.
    Compacted dirt floor showing roller and boot tracks, with capped white and grey stub-ups spaced across it and framed walls with windows and an exterior door behind.
    Compactor tracks across the graded floor.
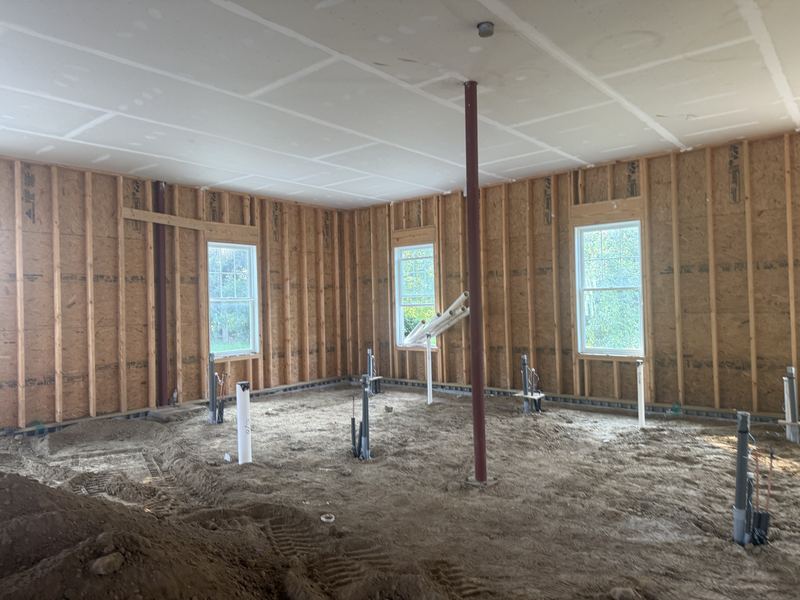
    A smaller framed room with a graded dirt floor, plumbing and electrical stub-ups along the walls, a red steel column in the centre, and three windows looking onto greenery.
    One of the rooms taking shape at the back of the suite.
  5. Stages 4 and 5 of 5 · Vapor barrier, ready for concrete

    Sealed, and Ready for Concrete

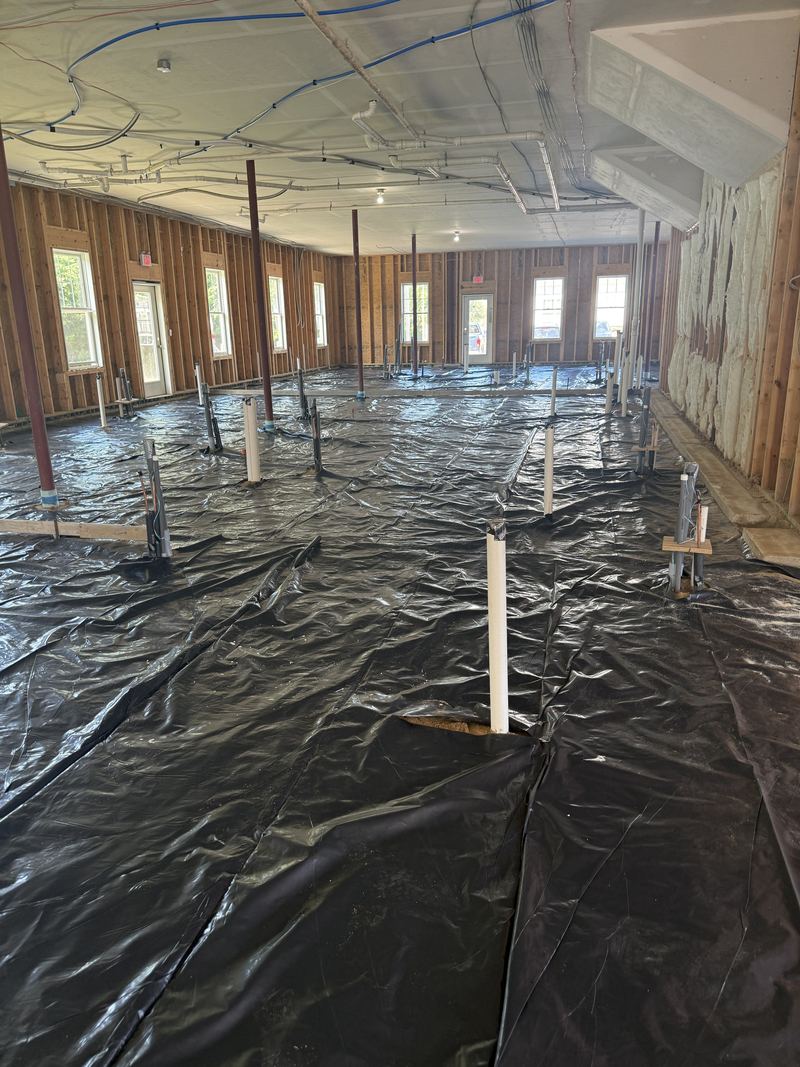
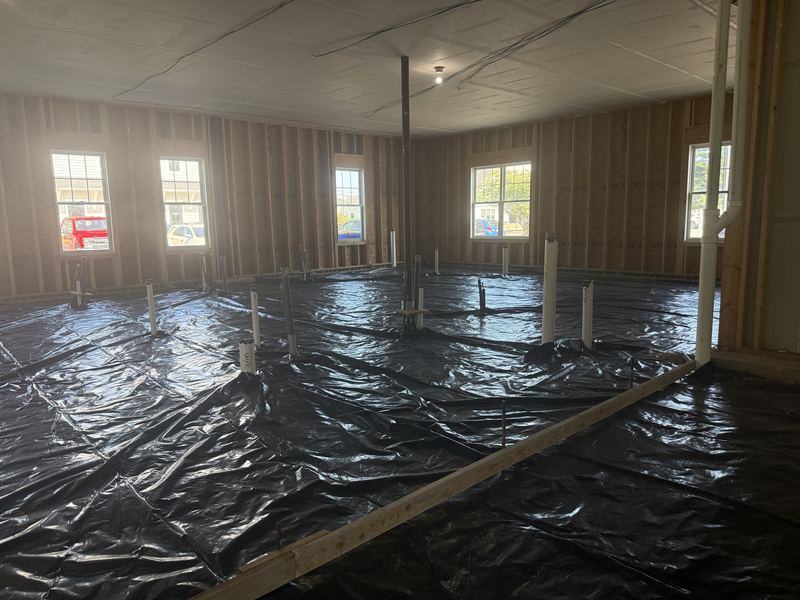
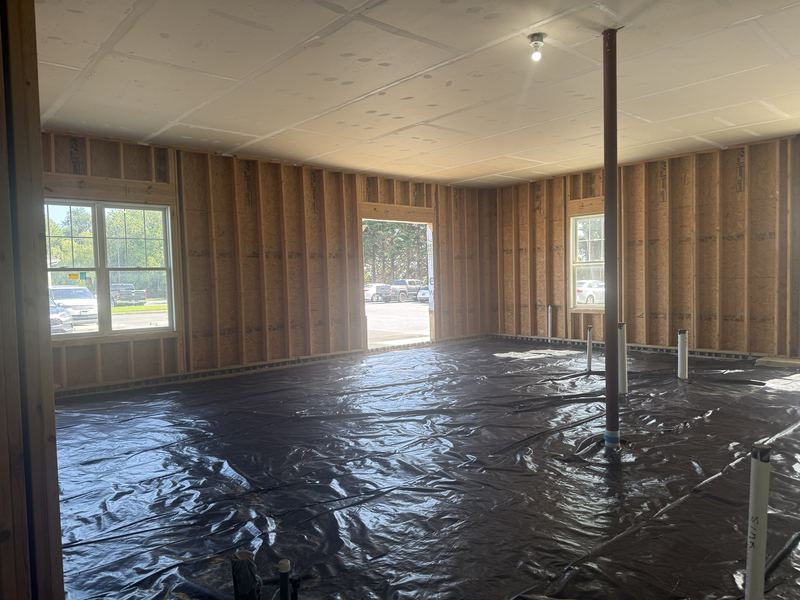
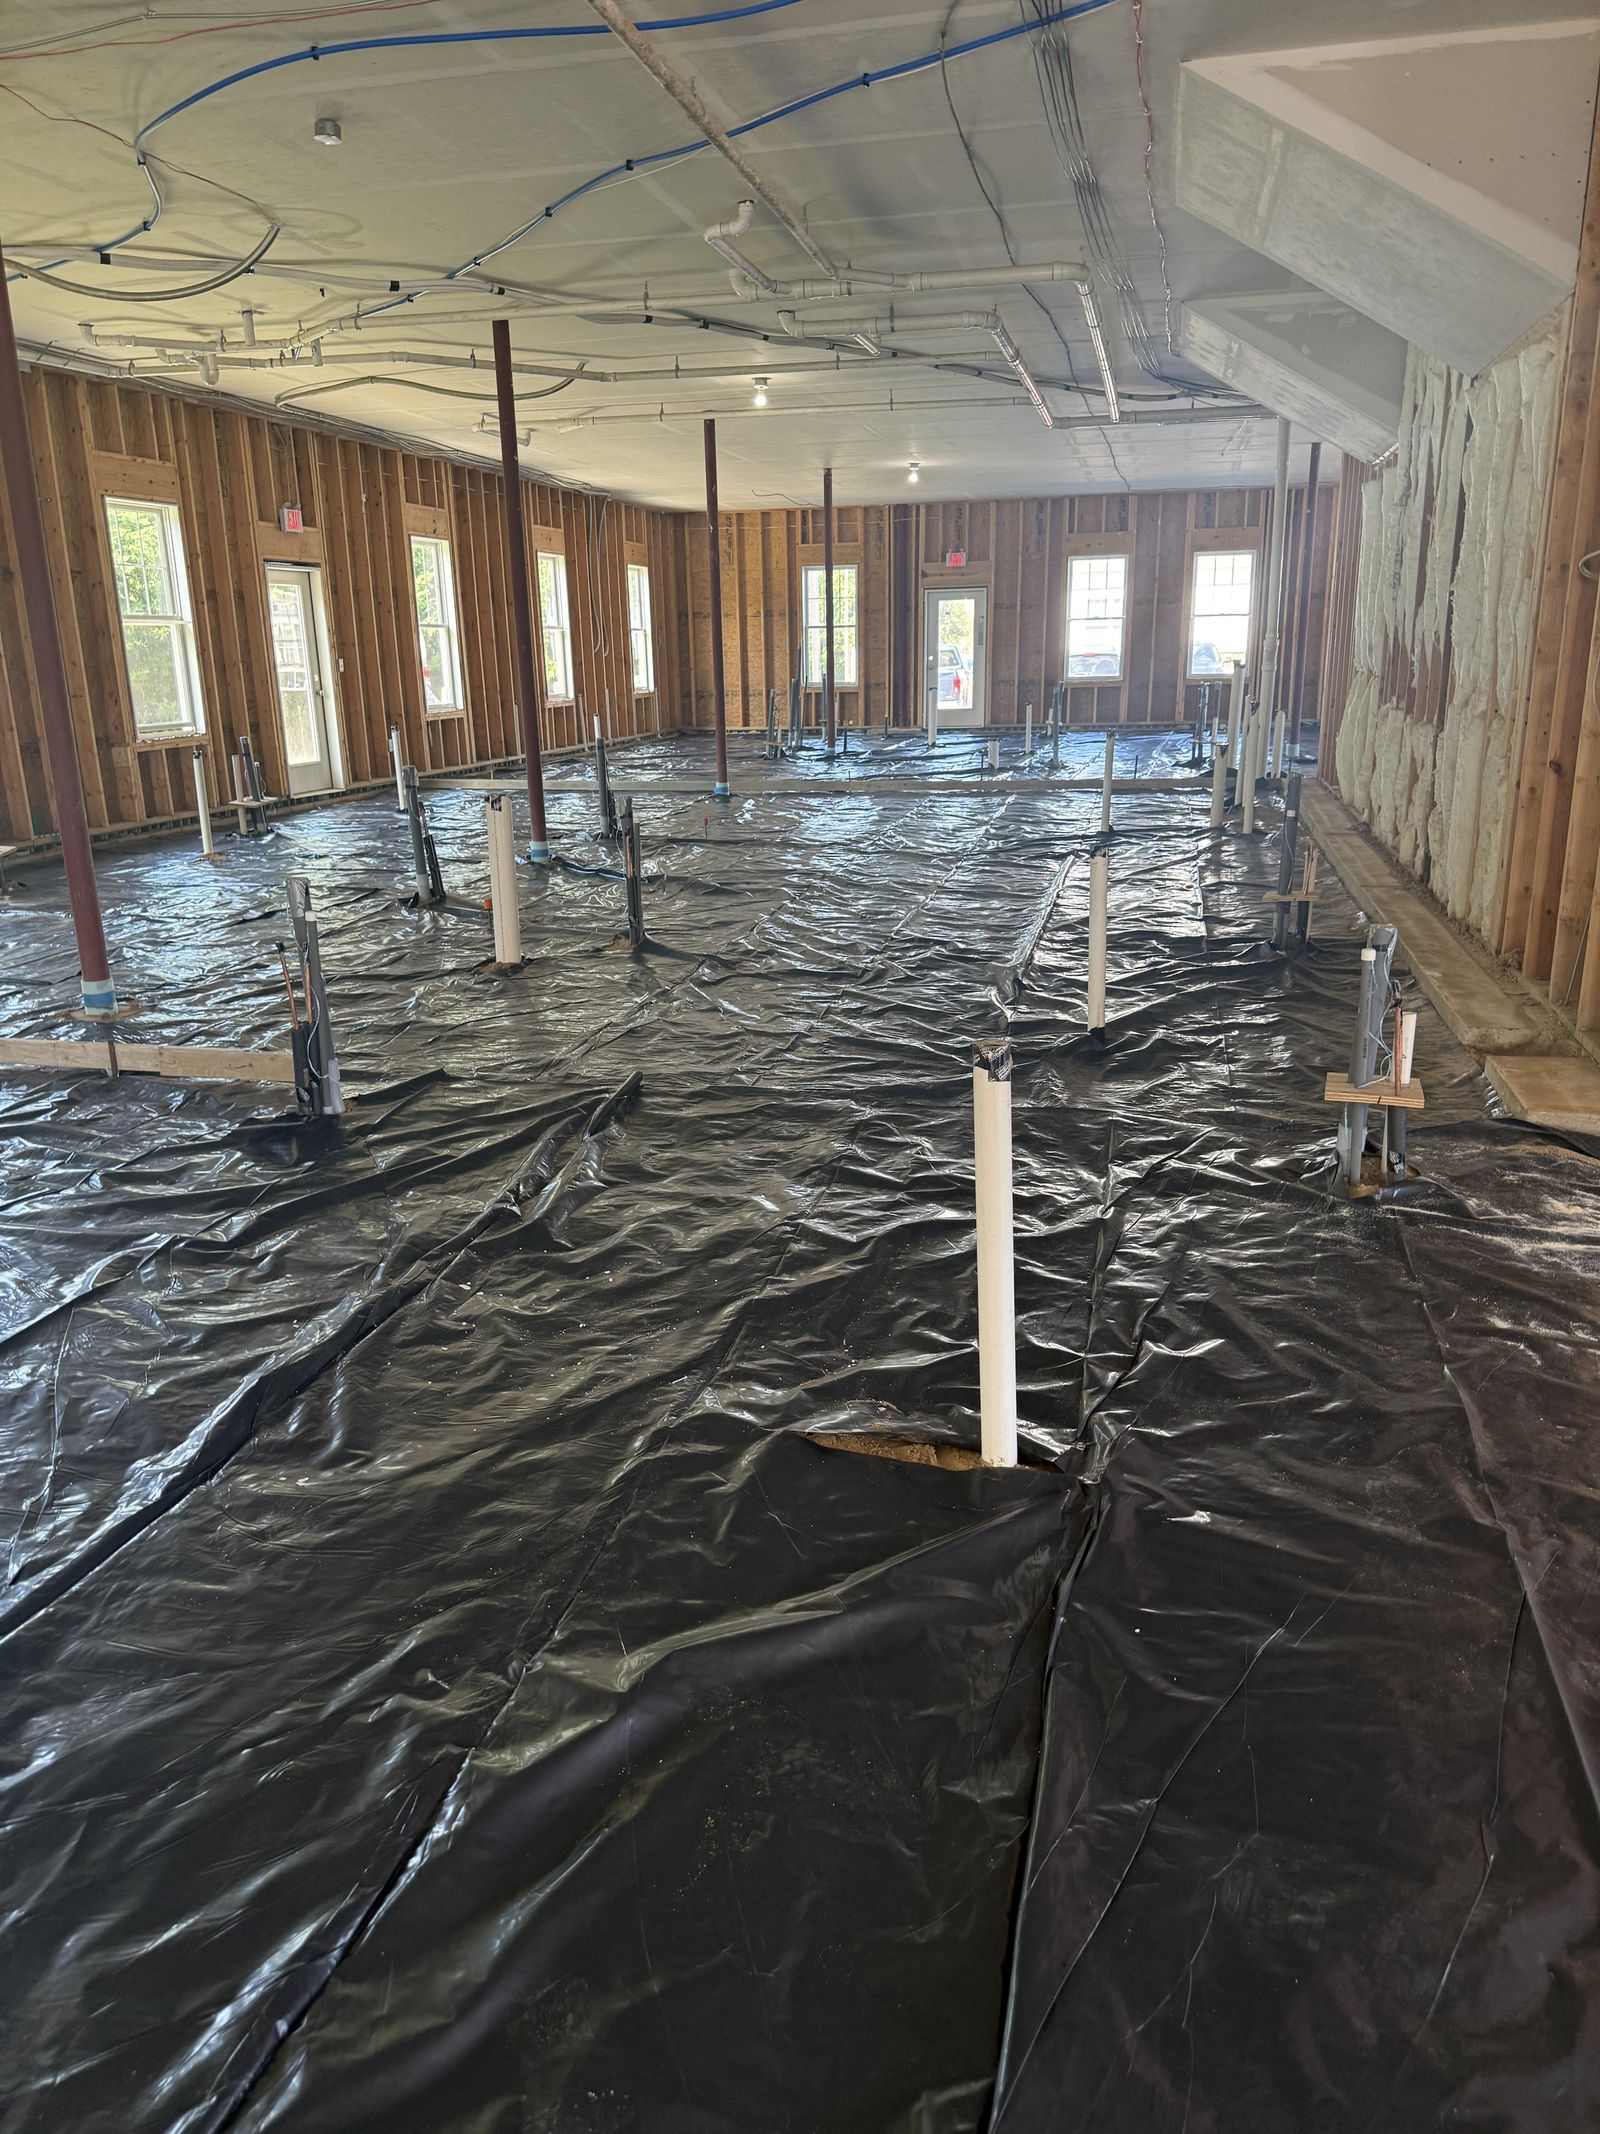
    The black sheeting is a vapor barrier. It sits between the ground and the concrete and stops moisture wicking up through the slab for as long as the building stands.

    It is the last thing that happens before the pour. The stub-ups are sleeved through it, the joints are lapped, and the timber you can see laid across the floor is a screed line: the reference the concrete crew will pull the wet slab flat against.

    This is the point where a building site starts to look like a floor plan. Stand in the middle of it and the rooms are already there, marked out in pipe.

    Black vapor barrier laid across the full floor with plumbing stub-ups sleeved through it, red steel columns, spray foam insulation on the right-hand wall, and overhead pipework.
    Vapor barrier down across the whole suite.
    Vapor barrier covering the floor with labelled stub-ups standing through it, a timber screed board laid across the foreground, and windows looking out to parked vehicles.
    A screed board set as the reference for the concrete pour.
    Interior corner with vapor barrier on the floor, framed walls, a capped stub-up marked SINK, and an open door frame looking out to the parking lot.
    Looking out through what will be a doorway.

    The next photographs from this room will have a concrete floor in them.

  6. Outside the building

    Where to Find Us

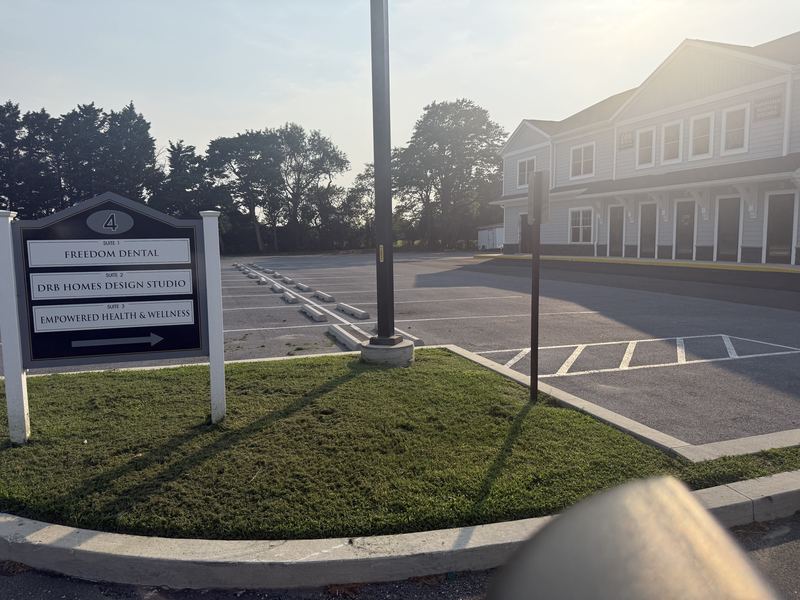
    Outside, the building, the parking, and the approach from Plantations Road are already finished and in use by the neighbouring suites.

    The parking sits directly in front of the building, on one level, a short and flat walk from the door. We will publish the confirmed accessibility details, including accessible spaces and step-free entry, once we can describe them from a completed site rather than from a plan.

    Parking lot in front of the Plantations Professional Park building at golden hour, with marked spaces, wheel stops, a lamp post, and the building directory sign at the left.
    The lot in front of the building, from the entrance drive.
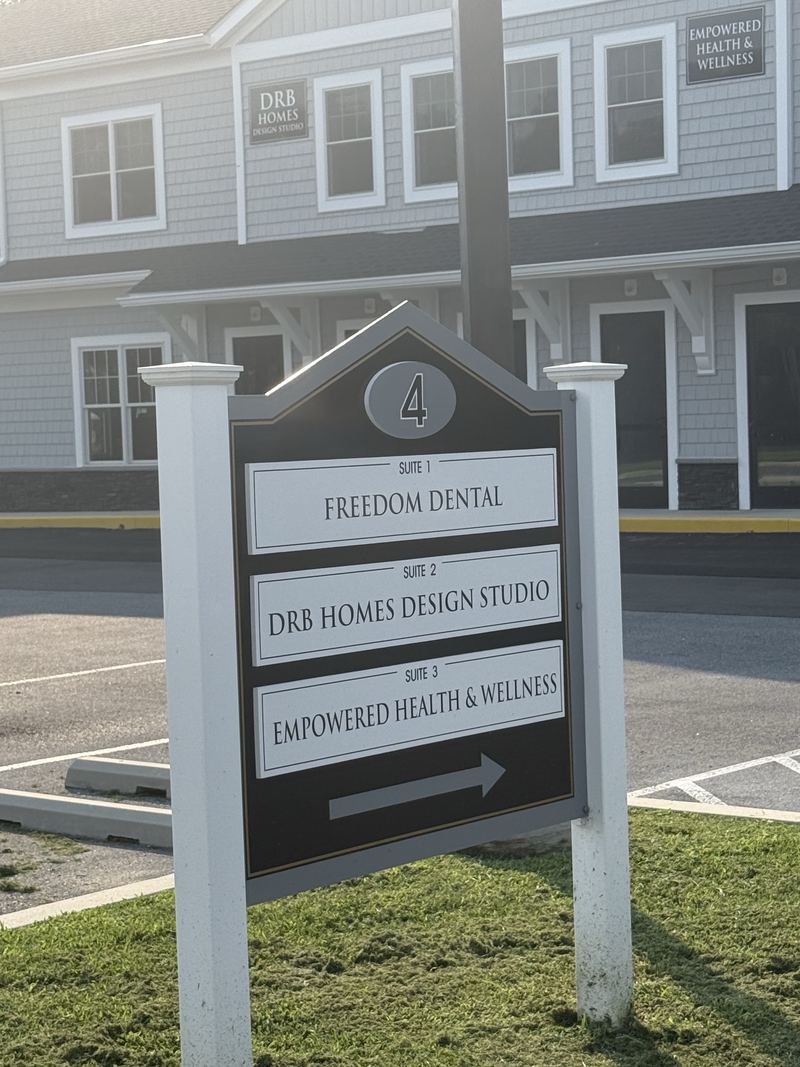
    Building directory sign for building 4 at Plantations Professional Park listing three suites, with the grey shingled building behind it.
    The directory at the entrance to building 4.
Written updates

Progress Reports

  • Construction update

    The Underground Plumbing Is In, and the Floor Is Ready for Concrete

    Black vapor barrier laid across the full floor of the suite with plumbing stub-ups sleeved through it, ready for the concrete pour.
    Vapor barrier down and screed lines set, ready for concrete.

    The part of the build that nobody will ever see again is finished.

    Over the last stretch of work, the floor of the suite was set out with string lines, opened up with trenches, fitted with drain lines set to a deliberate fall, inspected, backfilled, compacted, and graded. The black vapor barrier is now down across the whole space, and the screed lines are set.

    That means every fixture in the finished practice, every sink, every floor drain, and the plumbing for sterilisation, is now permanently located. It is the least glamorous stage of a dental build and the one with the least room for error, because it all disappears under reinforced concrete.

    The next milestone is the concrete floor itself. After that the interior build-out begins and the space starts to look like a dental practice rather than a building site.

    The photo story on this page walks through the whole sequence.

  • Construction update

    A New Dental Office Is Coming to Rehoboth Beach

    Work has begun on Smile Studio of Rehoboth, a new dental practice taking shape at 19411 Plantations Road in Plantations Professional Park.

    The location was chosen for access. Plantations Road sits just off the Coastal Highway and Route 1 corridor, and it is reachable from Route 24 and Route 9 without driving into the summer traffic on Rehoboth Avenue. That matters for year-round residents in Lewes, Long Neck, Harbeson, Milton, and Millsboro as much as it does for anyone staying at the beach.

    We anticipate opening in late November or early December 2026. Construction schedules can change, and we would rather tell you that plainly than publish a date we cannot hold. The opening list is where the confirmed date will go first.

    Between now and then we will use this page to share what is actually happening: build-out progress, the technology going into the operatories, and introductions to the providers and team who will be caring for patients here.

Construction schedules can change. Join our opening list for the confirmed opening date and early scheduling information.

Follow along

See the Concrete Go Down

The next update from this room will have a floor in it. Opening list subscribers get progress photos, provider introductions, and the confirmed opening date first.